Bringing Character Back to our 1930s Kitchen
As soon as we moved into our house, I knew I wanted to refresh the kitchen. It was functional but felt bizarrely misplaced in a home that had many of its original 1930s details. I suspect it fell victim to the mid-2000s reno craze that stripped older homes of original details. *sob*
First impressions
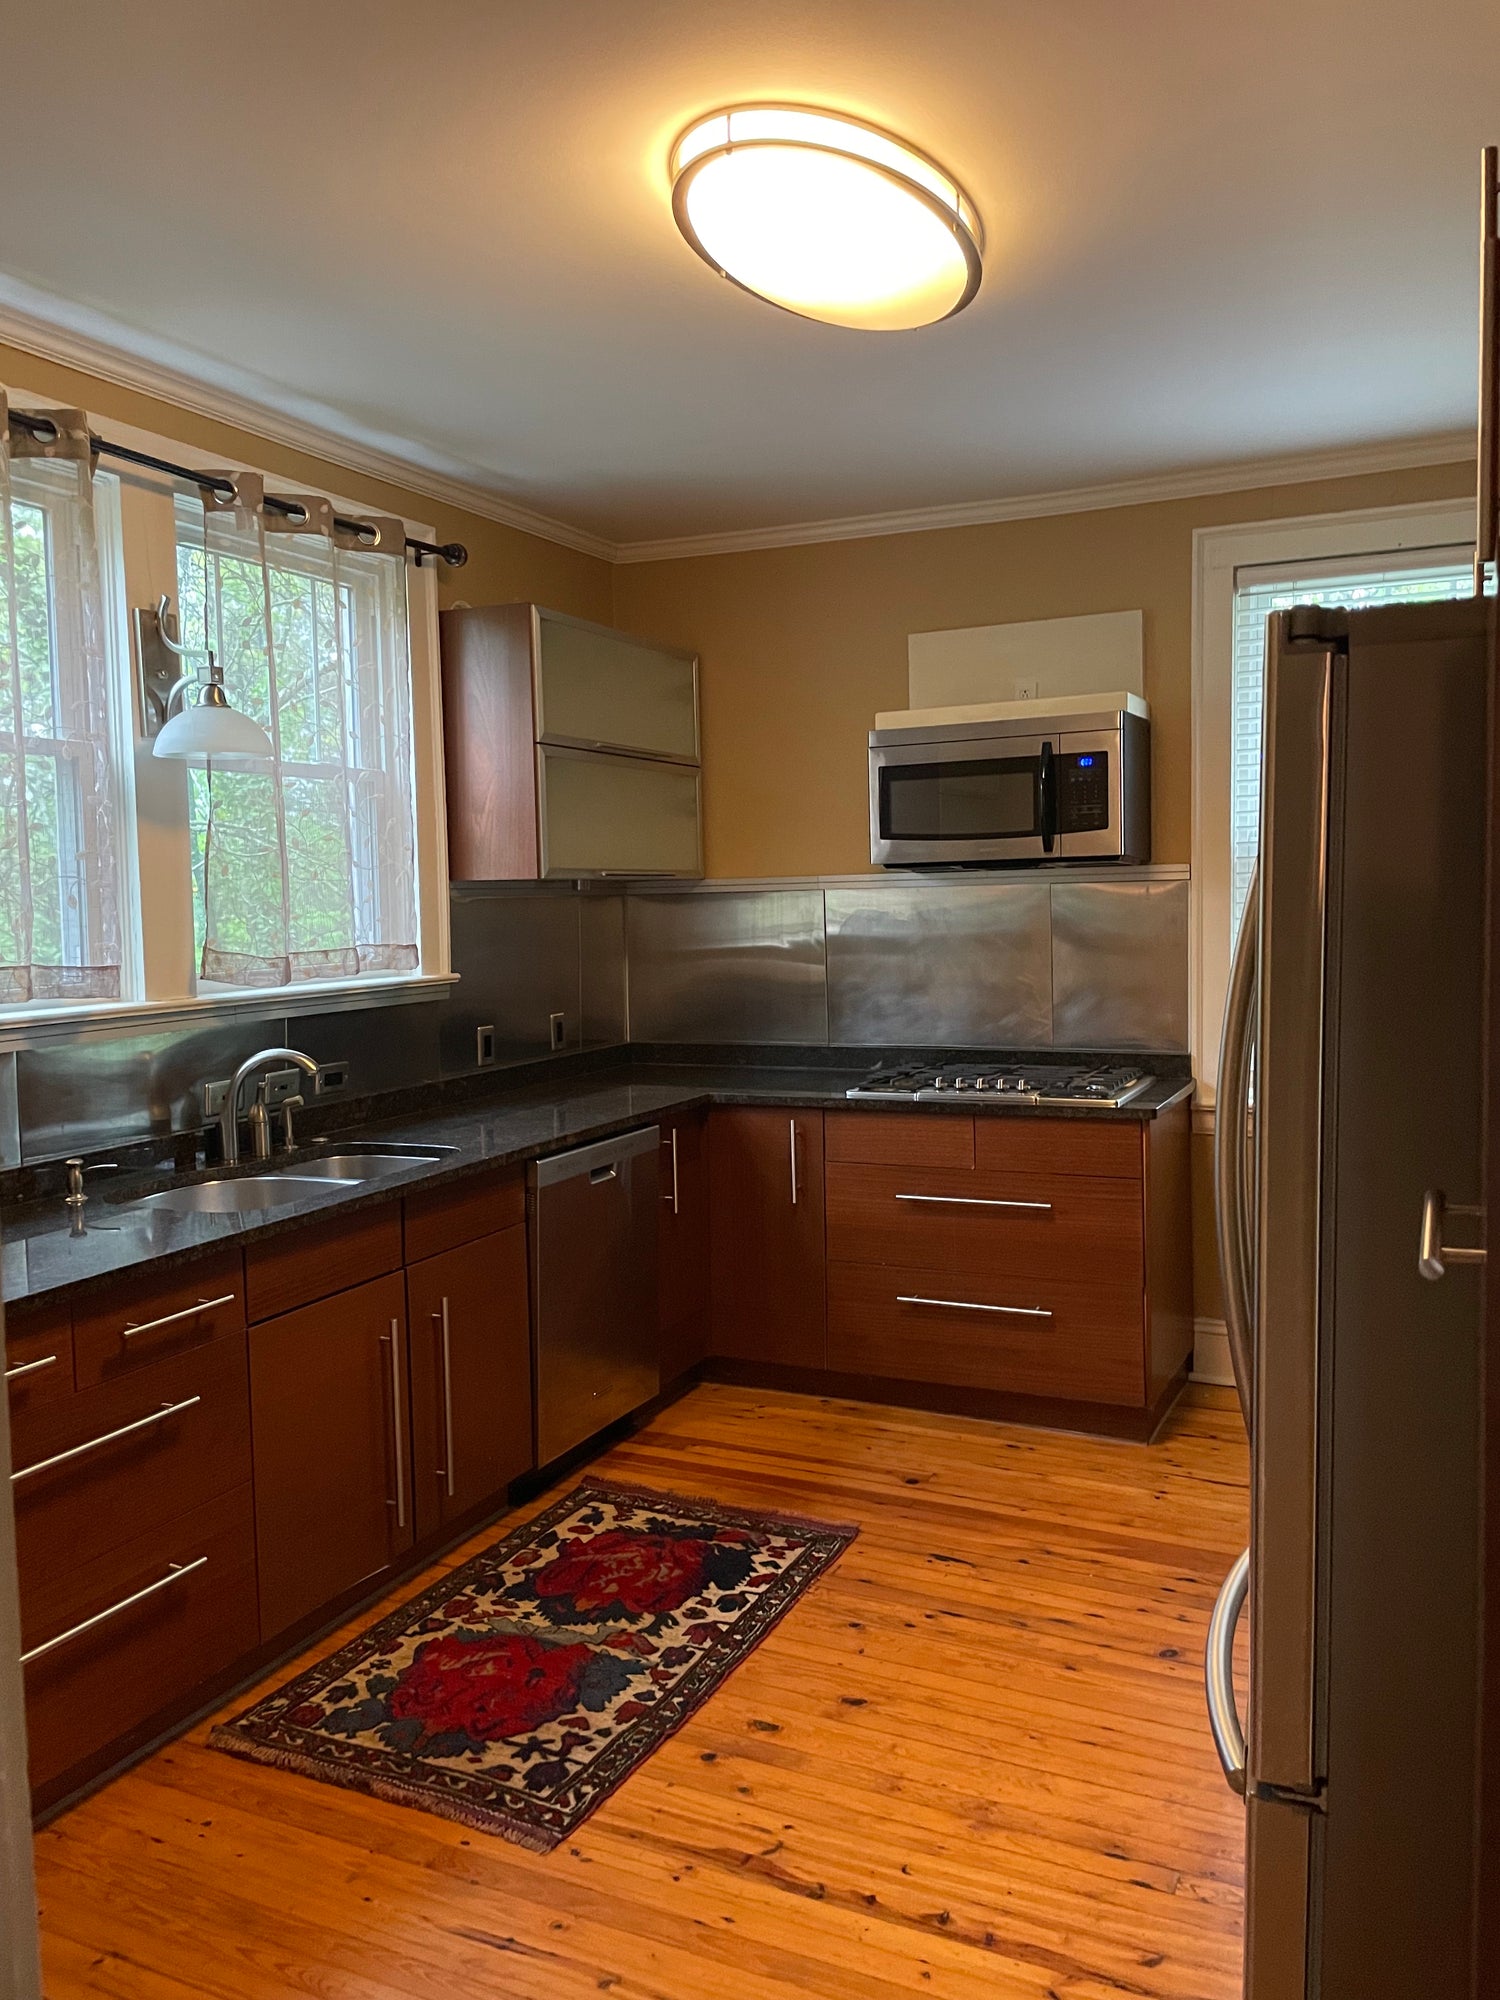
It wasn't the worst thing I'd seen, but it wasn't happy. The drab colors and UFO light made the room feel stale and smaller than its relative spaciousness. The upper cabinets were a joke. They opened like garage doors but the mechanism to hold them in place had stopped functioning. Every time you pulled out a dish you risked it crashing to the floor or your arm getting pinned. I'm certain Olive learned the word "fuck" because of these cabinets.
The floor plan however, was well considered and there was ample storage. More than we could fathom using.
My renovation goals were a combo of my design ethos and the reality of how far I could stretch a $6,500 budget (all in it ended up being closer to $7,000):
- Make the room feel expansive yet enveloping
- Incorporate nods to the 1930s era of the home
- Add art and elements that were unique but not trendy
- Tackle as many of the projects as possible myself
- Minimize waste
The process
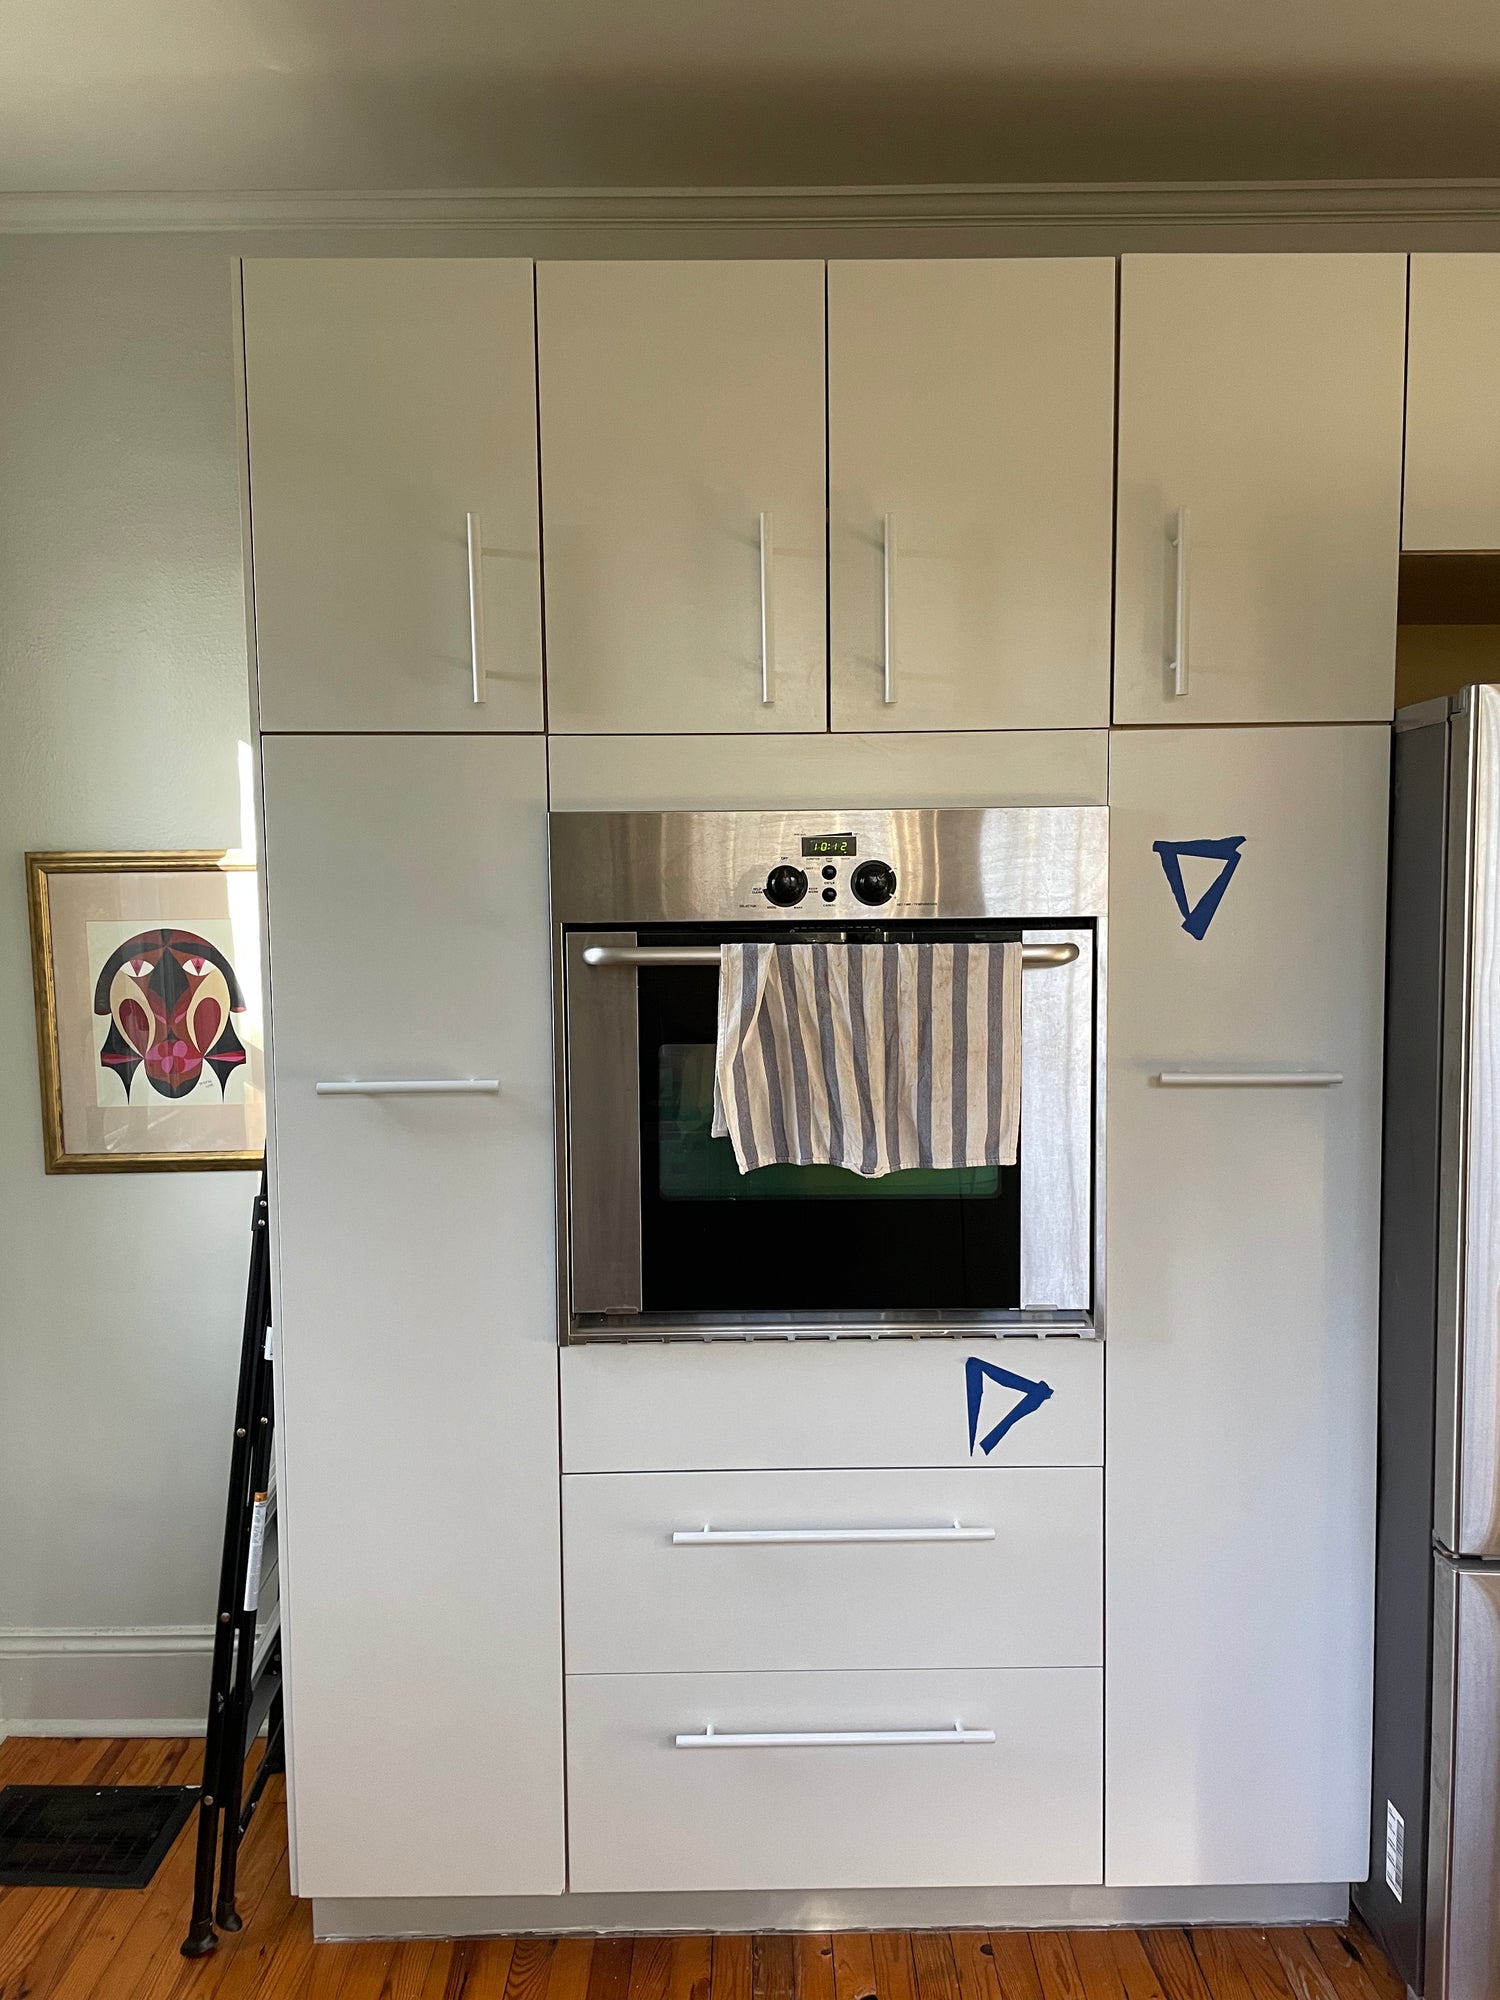
I started with a paint color, which is rarely how I operate, but I knew painting could be done immediately and at a low cost. I wanted a color that would connect the lush greenery surrounding the room with the stainless appliances. Something cool and calming. Benjamin Moore's Sleigh Bells was just that. A blue grey that glows in the morning light and softens at night.
To achieve a peaceful, cocoon-like quality, I painted everything the same color. For three months from 7:30pm-10:30pm, I worked exclusively on the cabinets. Degreasing + sanding + cleaning + priming (x2) + painting (x2) + shellacing (x2) cabinets is therapeutic madness.
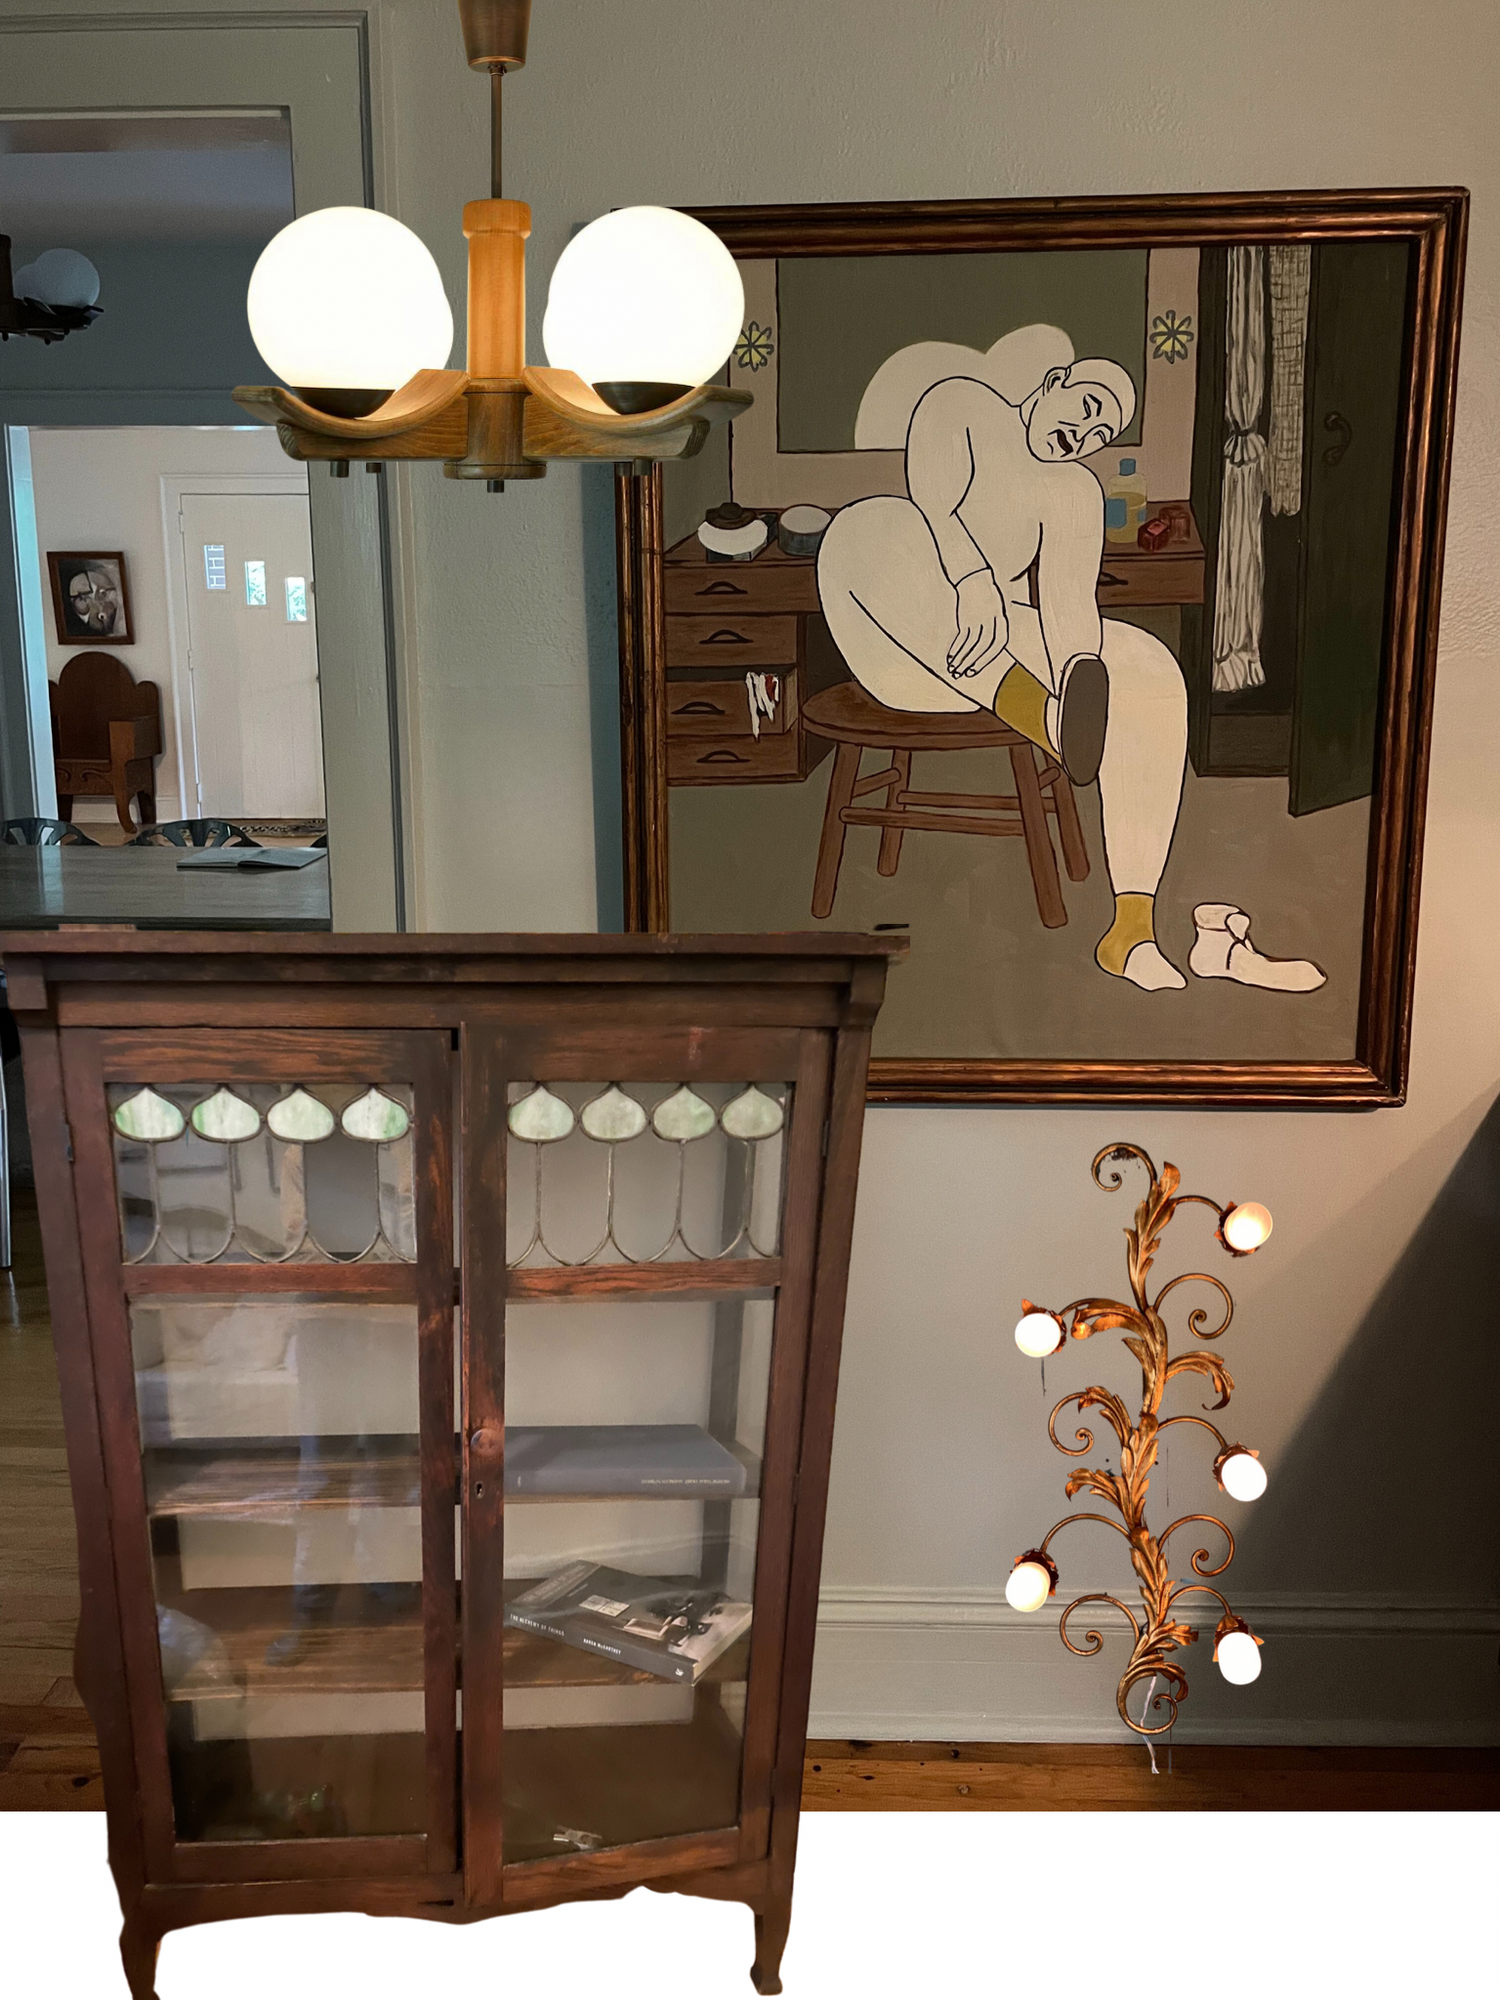
When not painting because MY GOD do you think I could keep up that schedule uninterrupted, I would hunt for furnishings. The stars aligned big time on this piece of art.
I found it a month into the project and desperately love it. It was painted in the 1930s, perfectly fit our blank wall and featured colors that would appear elsewhere in the room. It cost $500 shipped from California. I would have paid more for it and am grateful I didn't have to. I also know I will shelp it around for the rest of my days.
The cabinet and light fixtures were other early finds. An 1880s English cabinet found on Facebook Marketplace that I intended to convert into an upper ($100), a 1960s gilded Regency sconce ($250) and an Eastern European ceiling fixture ($250). Only 2 of the 4 ultimately made the cut.
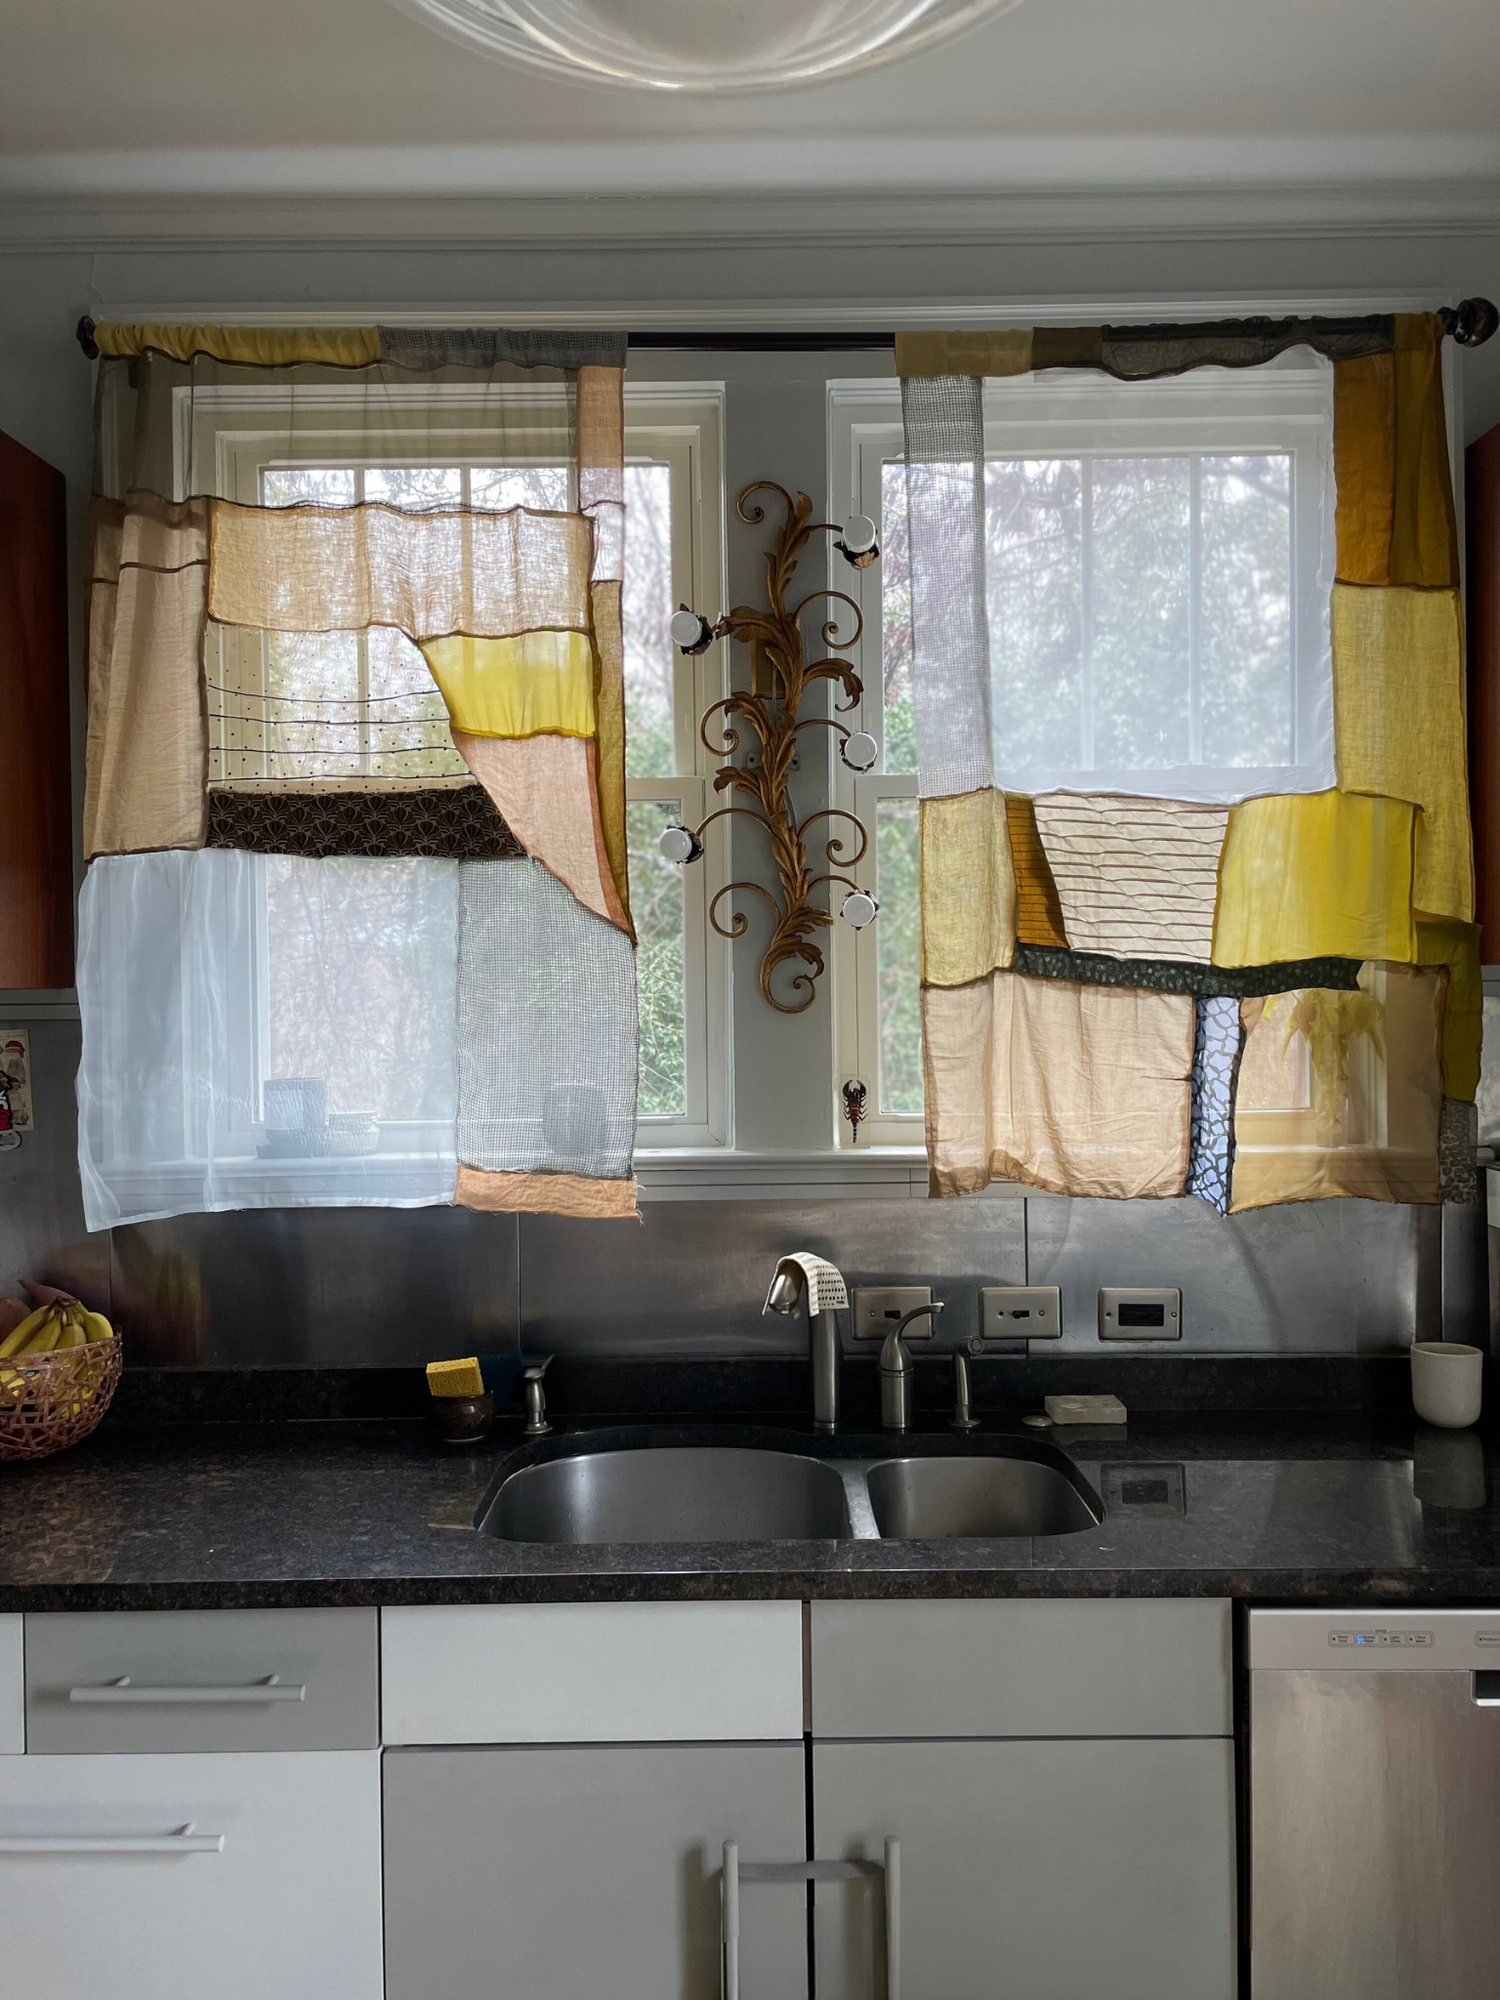
Finishing the cabinets was an exhalation with a promise to never do that again. It also meant I had space for a more creative project.
I have long pined for pojagi curtains. They inherently minimize waste by utilizing fabric scraps and offer subtle privacy. They also serve as art.
My husband's aunt inherited a collection of textile scraps from a local artist during her relocation purge. She generously offered them up for this project. The end result is breathtaking... just don't look too closely ;).
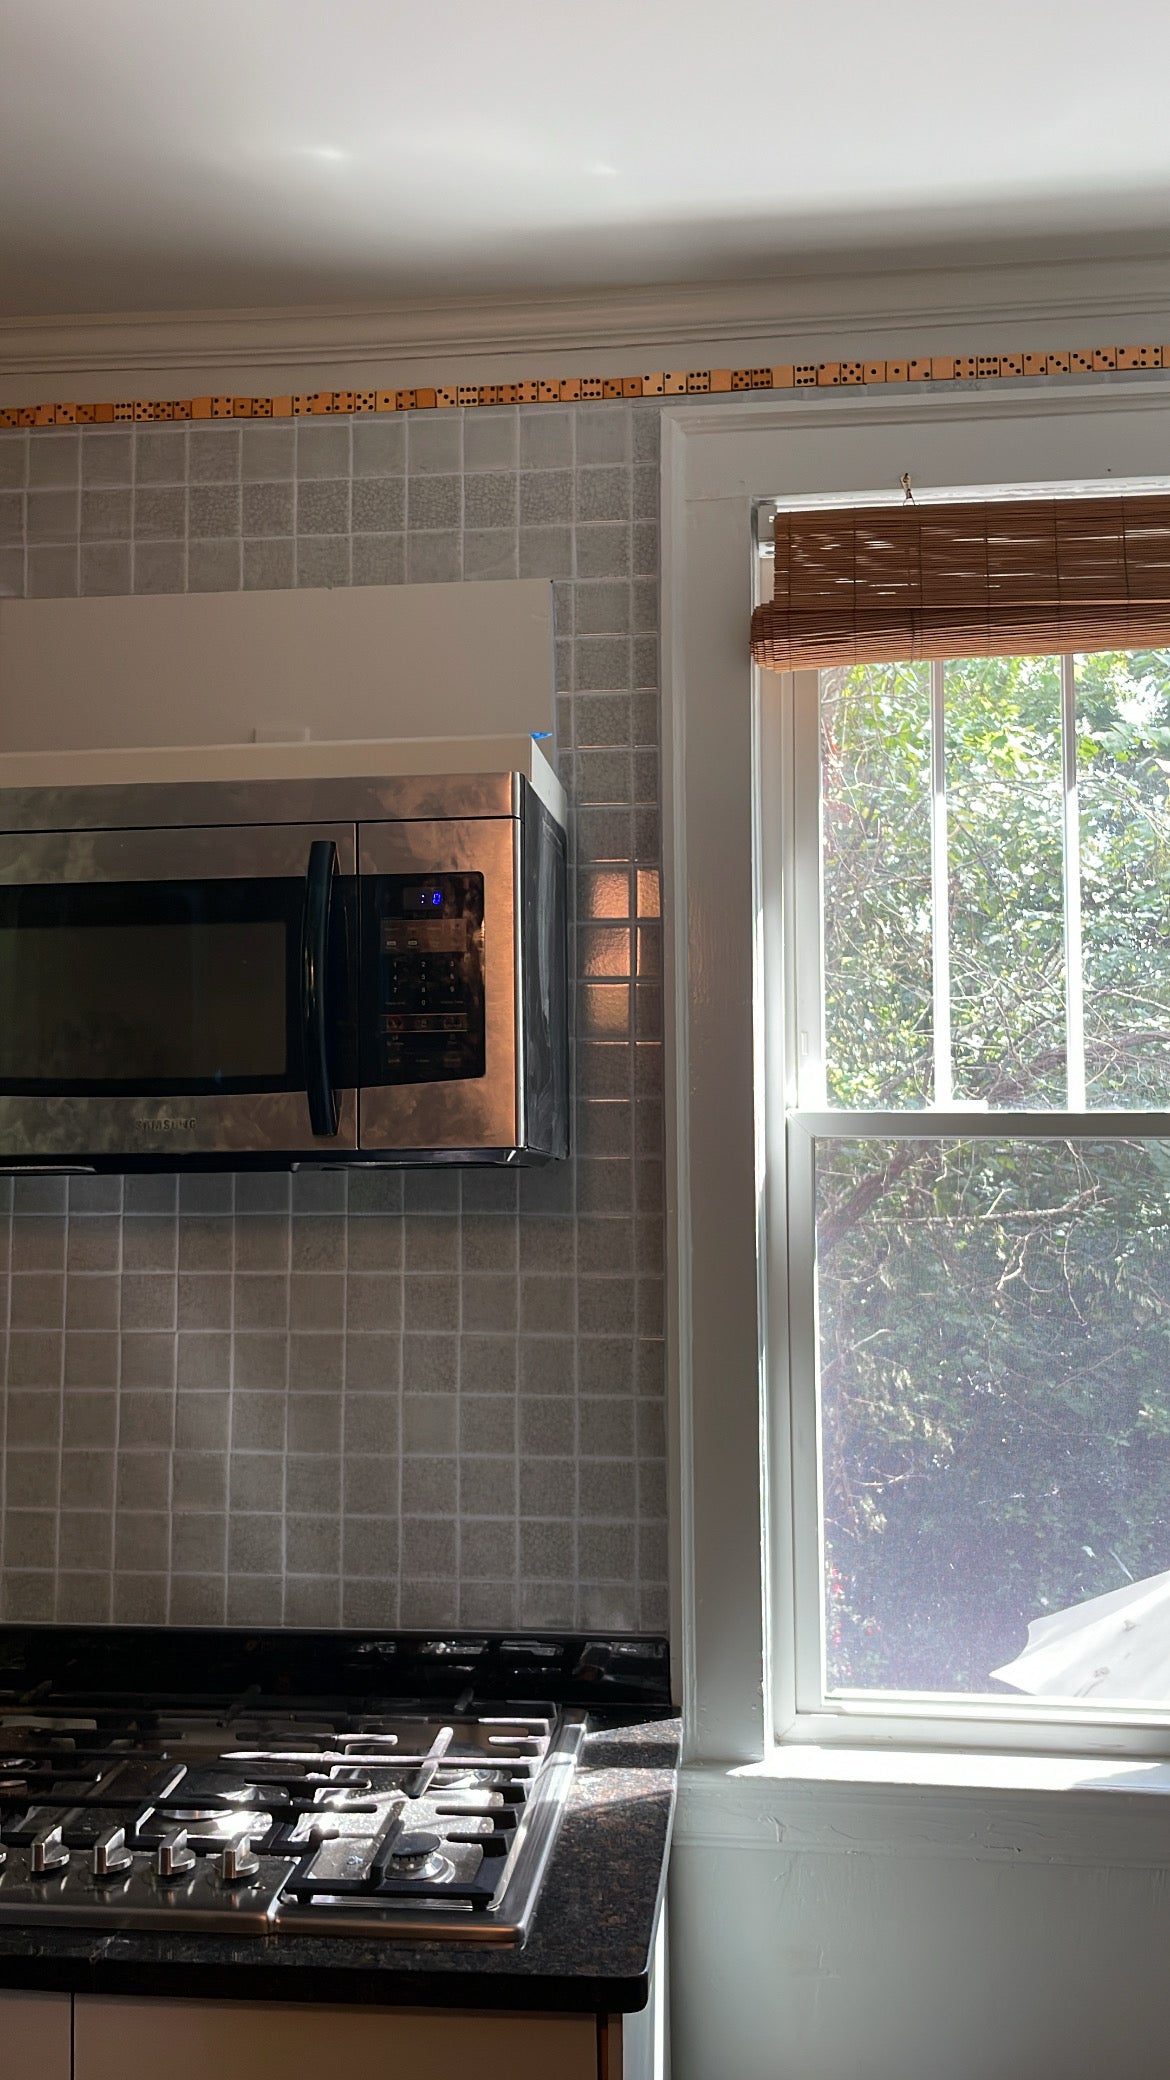
Tiles were my splurge. They felt authentic to the age and character of our Spanish revival. I wanted ones nearly the same color as the paint but with some character of their own. I landed on Fire Clay's sadly discontinued Mist with Black Patine. It has a crackle finish and luminescent quality.
The domino trim was an inspired decision made late one evening. A playful nod to 1930s trimmed kitchens. I spent 5 months sourcing incomplete sets of Bakelite dominos on eBay and Etsy. I love the patina and coloring that each domino brings. It's become a signature for me (see logo).
I hired professionals for install for the precision required. Once finished, I knew I'd made two mistakes: 1) I'd picked the wrong grout color and 2) wrong trim placement. I wanted a grout that would be invisible and thought the pale blue would achieve that. It had the opposite effect. It bothered me so much that I spent an evening coloring over it with grey chalk.
Though 1930s kitchen trim tends to runs along the top of kitchens, when in place, the dominos felt discordant. I ended up prying them from the wall and running them along the baseboard and doorframe instead.
The Now
-

I love how light bounces off the tiles and makes the room glow. Wooden fish sourced from Bees Knees Vintage. Vintage oushak rug sourced from Etsy.
-

The microwave remains an eyesore, but was out of scope for this project. I leaned in and used it to display art found by Abigail Bell Vintage.
-

Antique cabinet sourced from Good Eye House and Style in a fortuitous stroke of luck and timing. Pieced copper fruit bowl from Monte Vision. Antique humidor turned bread box was a thrift find.
-

Corner of the kitchen abutting our dining room. Light fixture from a local Habitat Restore.
-

My favorite piece of art of all time found on Goodwill's auction site. Bakelite domino trim sourced from eBay and Etsy.
-

Back corner of the kitchen featuring a $30 table found at an estate sale, $15 curtain made from tulle and ribbon and wooden artichoke (already owned).
-

Japenese Noh theater masks sourced from eBay. Ceramic jars made by my best friend, Mackenzie Camp Ceramics.
-

Art found at Goodwill. 1950s carved pullstring toy found at Portland's Flea for All.
-

Pojagi curtains by me, tiles from Fire Clay (discontinued Mist with Black Patine), framed sketch inherited from my grandmother, "moon" light fixture from Vakker Lights and vase from my husband's aunt.
Photos were taken by Chelsea Lane Photography.
No project is ever "done" for me. Rooms and homes evolve over time and as needs change. I love where things landed but I always leave room for evolution. What's next? Nothing for a while, but I can't wait to actualize my vision for replacing the microwave. It involves a glass range hood á la Casa de Vidro and mosaic backing. And of course regrouting. Go with the grey, baby!
If you like what you see and want help with your own project:


